Introduction
Are you looking to optimize your digital marketing strategy? One way to do so is by setting up Conversion API on your website. In this blog, I will guide you through the step-by-step process of setting up Conversion API for your WordPress website to help you drive more conversions and increase your ROI.
Step 1: Log in to your Business Suite and select the account
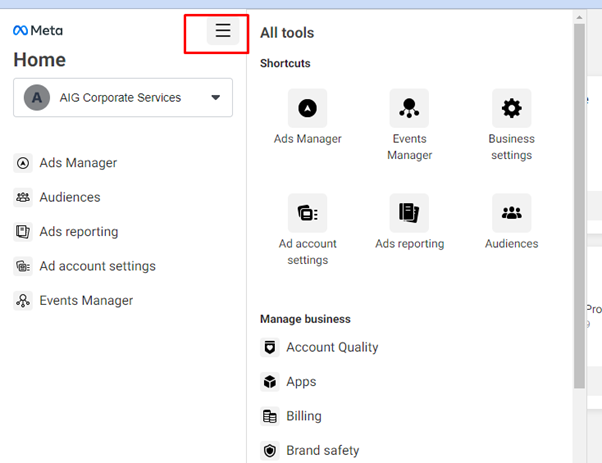
The first step is to log in to your business suite from business.facebook.com and select the account where you want to set up your conversion API. Once you’ve done that, click on All tools and then click on event manager.
Step 2: Check if Meta Pixel is installed.
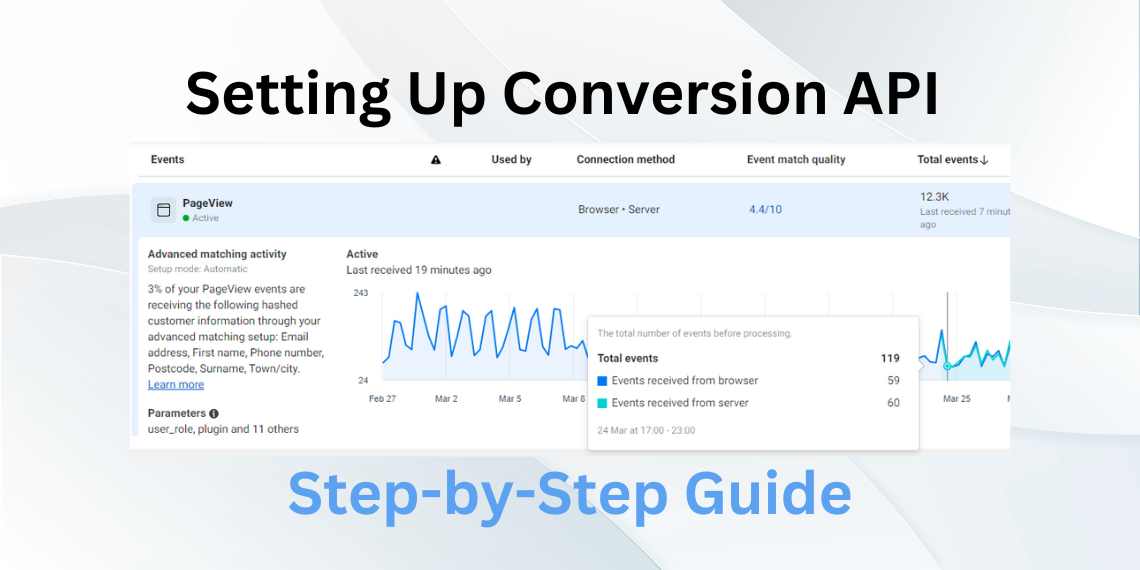
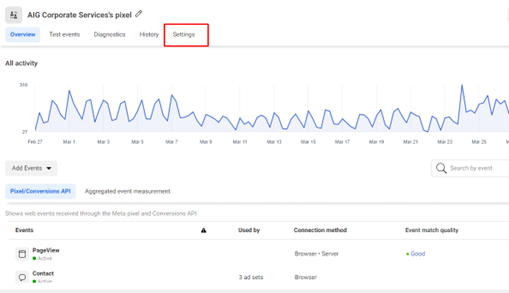
On the event manager overview page, ensure that your meta pixel is installed on your website. Once you’ve confirmed this, go to the left column, click on data sources, and then click on settings.
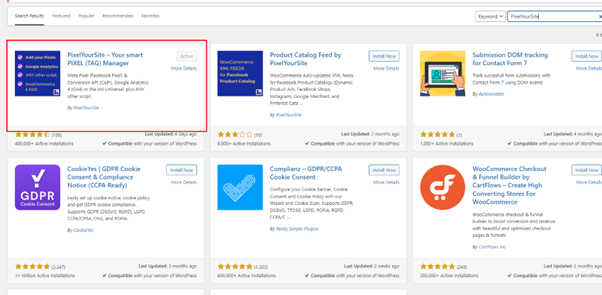
Step 3: Install and activate PixelYourSite plugin.
Now, log in to your WordPress dashboard and in the plugin section, click on add new and search for “PixelYourSite.” Install and activate it.
Read Also: 5 Facebook Ads Messaging Tips You Have Not Heard Before
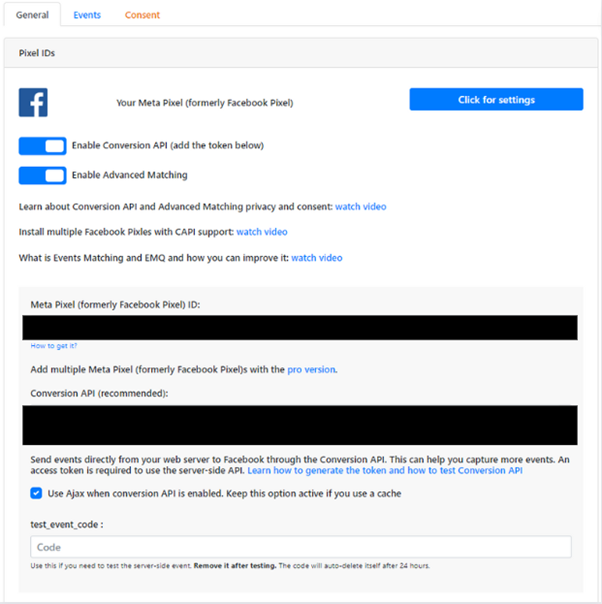
Step 4: Enable Conversion API in PixelYourSite plugin.
In the general setting of “PixelYourSite,” click on Meta pixel setting and enable Conversion API (add the token below). Also, enable Advanced Matching and add meta pixel id and conversion API in the required fields.
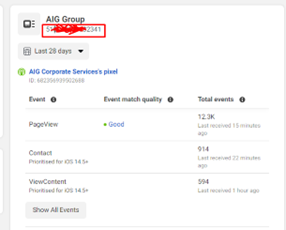
Step 5: Find Meta Pixel ID
To find your Meta Pixel ID, go to https://business.facebook.com/events_manager2/overview and copy the pixel ID from there.
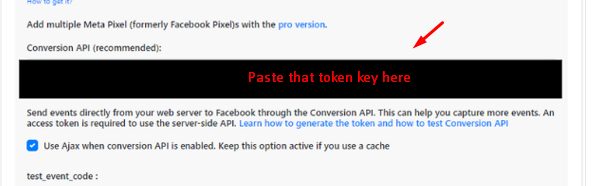
Step 6: Get Conversion API Key
To get your Conversion API key, go to the data sources section of the event manager and click on “Generate access token.” Copy that token and paste it into the Conversion API section that I mentioned earlier in the blog.
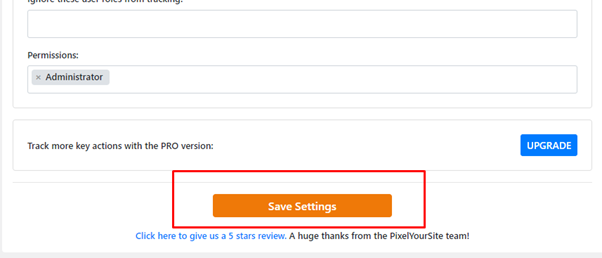
Step 7: Save settings
After putting data in the required fields, click on save settings.
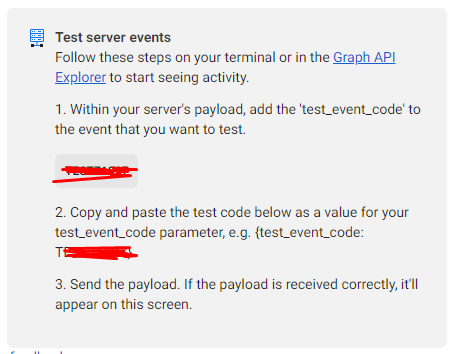
Step 8: Test if Conversion API is working
To test if your event setup is correctly installed, go back to your event, click on test event, and copy the test server event code. Then, put it in the “test_event_code” section of PixelYourSite plugin on WordPress.
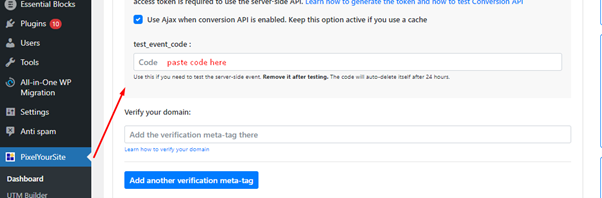
After that, go back to the event manager test events section and put your website URL to test if Conversion API is working or not. If your Conversion API is working, you will see that events are duplicating.

In conclusion, setting up Conversion API is a simple yet powerful way to optimize your digital marketing strategy. By following these step-by-step instructions, you can start driving more conversions and increasing your ROI. So, what are you waiting for? Set up Conversion API today and watch your conversions soar!

Hello, I’m Ali Raza, the brain behind Digital Realm Trends.
Hailing from the vibrant world of digital marketing, I’ve honed my skills over years. Based on my experience, I’m here to unravel the complexities of digital marketing, analytics and paid marketing, crafted for individuals like you. Join me in uncovering the power of digital marketing tools and strategies, fueled by experimentation and insights.